New Model Stable Cascade Part 2

In the last article, we briefly went through the basics of Stable Cascade. In part two we are going to provide you with a detailed guide to using Stable Cascade, including inference on the model and instructions for using the extended functionality.
Table of Content
Instructions for use
In this section, we will provide you with a detailed guide to using Stable Cascade, including inference of the model and instructions for using the extended functionality.
Preparing to run
Using Python3 inference, you can run the model through the officially provided notebooks. You'll find more details on downloading the model, computational requirements, and some tutorials on how to use the model. Specifically, notebooks are provided for the following use cases.
Before you open them, you need to do two more things:
- Install all dependencies that are listed here. Simply do
pip install -r requirements.txt - Additionally, you need to download the models you want. You can do so by taking a look here and following the steps.
Download the model
Of the many models on offer, it's important to make sure you only download the ones you need. To simplify this process, the official provides a convenient script download_models.sh. Its basic usage is as follows:
bash download_models.sh essential variant bfloat16 - Essential: Essential is an optional parameter. With it, you can decide whether to download EfficientNet, Stage A, and Previewer. If this is your first time running this script, it is highly recommended to download these necessary components as they are the basis for the entire model.
- Variant: The variant parameter determines which variant you will use for Stage B and Stage C. Options include:

- bfloat16: bfloat16 is the last optional parameter and determines the accuracy with which you download Stage B and Stage C. If you are looking for faster download speeds, you can choose bfloat16 if your machine supports it; otherwise, you can use float32.
- Recommended configuration: For users with strong GPU capabilities, we recommend downloading the large Stage C with up to 360 million parameters. It performs better and is more deeply fine-tuned. Currently, the ControlNet and Lora examples are only available for large Stage C. For Stage B, there is not much difference between the two sizes. The large Stage B performs better in reconstructing detail. But if your GPU power is limited, the small Stage B is also a good choice.
- Note: Currently, the model cannot run with float16 precision, only bfloat16 or float32 is supported. After some technical investigation, we hope to resolve the issue and possibly support inference with float16 precision in the future.
Inference
Running the model can be done through the notebooks provided in the inference section. You will find more details regarding downloading the models, and compute requirements as well as some tutorials on how to use the models. Specifically, there are four notebooks provided for the following use cases:
Text-to-Image
The official provides concise notebooks, which implement the basic functions of text-to-image, image change, and image-to-image. There is no COPY here, just get it yourself. The effect is as follows:

Cinematic photo of an anthropomorphic penguin sitting in a cafe reading a book and having a coffee.Image Variation
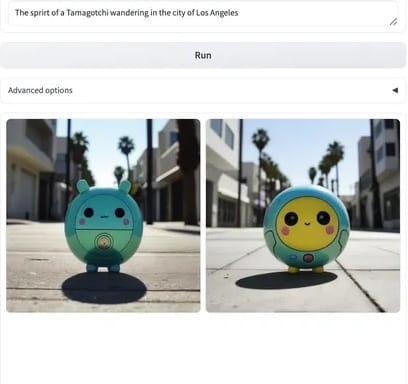
The model understands image embeddings, which makes it possible to generate variations of a given image, see the image below:

Image-to-Image
By adding noise to a specific point in the image and then letting the model generate from this starting point. The picture on the left has been adjusted to 80% noise, and the effect is shown below:

ControlNet
How to use the official ControlNets or how to use a model ControlNets trained by yourself? The official also provides example notebooks, which implement functions such as patching/expansion, face identity, edge detection, super-resolution, etc. You can obtain it by yourself. The effect is as follows:
- Inpainting/Outpainting

- Face Identity

- Canny

- Super Resolution

LoRA
The official also provides the implementation of LoRA, showing how to use the trained LoRA for training and using LoRA equipped with the Stable Cascade function. This approach is particularly useful for fine-tuning text conditional models (stage C). Specifically, you can add new Tokens and learn from them while also introducing a LoRA layer to the model. For example, the LoRA training data and generated effects on dogs are as follows:


Image Reconstruction
For those interested in delving deeper, here's a very appealing point: If you plan to train your own text conditional model from scratch, and perhaps consider adopting a different architecture than the official Stage C, you can try Stable Cascade The (diffusion) autoencoder used.
This autoencoder can work in a highly compressed space, similar to using Stable Diffusion's VAE to train your own model (such as Dalle3). Stage A and B can be leveraged equally while enjoying higher compression rates, which will significantly speed up training and running models.
Official notebooks are provided to demonstrate how to encode and decode images, as well as the specific advantages of doing so. For example, let's say you have a batch of images with dimensions 4 x 3 x 1024 x 1024:

You can encode these images to a compressed size of4 x 16 x 24 x 24, giving you a spatial compression factor of 1024 / 24 = 42.67. Afterward, you can use Stages A & B to decode the images back to4 x 3 x 1024 x 1024, giving you the following output:

It can be found from the pictures that even in minute details, the reconstructed image is very close to the original image. Such reconstruction effects cannot be achieved using traditional methods such as VAE. The official notebooks provide more information and easy-to-use code for you to try and explore.
Gradio App
You can use the Gradio application to implement a visual interactive interface. One thing to note is that during the startup process, the program needs to download some Hugging Face models and perform file checks, so in the startup environment, you may need to use a foreign VPN to ensure that these operations are completed smoothly.
pip3 install gradio
pip3 install accelerate # optionally
pip3 install git+https://github.com/kashif/diffusers.git@wuerstchen-v3